儘量記錄下來所有的操作步驟.以後可以當筆記使用
1.下載 ubuntu server 19.04版本的 vmdk檔案
在osboxes網站下載所需要的vmdk檔案
Ubuntu Server 19.04 Disco Dingo 版本
該檔案主要是已經安裝好的ubuntu server。但是網路部份需要下載後再重新設定一次才能正式上網。
https://www.osboxes.org/ubuntu-server/
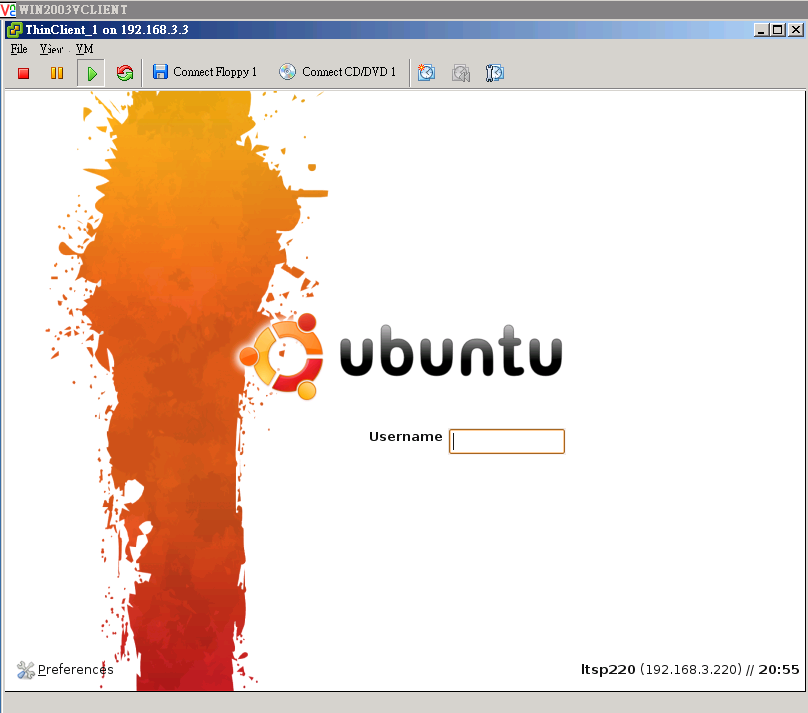
2.設定vmware 並開啟
2-1.
新增rstudio帳號
sudo adduser rstudio
設定sudo 權限
nano /etc/sudoers
增加帳號權限
# User privilege specification
root ALL=(ALL:ALL) ALL
rstudio ALL=(ALL:ALL) ALL
3.設定19.04 Disco Dingo 網路
自動取得IP的設定
Dynamic IP Address Assignment (DHCP Client)
To configure your server to use DHCP for dynamic address assignment, create a netplan configuration in the file /etc/netplan/99_config.yaml. The example below assumes you are configuring your first Ethernet interface identified as enp3s0.
network:
  version: 2
  renderer: networkd
  ethernets:
    enp3s0:
      dhcp4: true
The configuration can then be applied using the netplan command.
sudo netplan apply
Static IP Address Assignment
To configure your system to use static address assignment, create a netplan configuration in the file /etc/netplan/99_config.yaml. The example below assumes you are configuring your first Ethernet interface identified as eth0. Change the addresses, gateway4, and nameservers values to meet the requirements of your network.
network:
  version: 2
  renderer: networkd
  ethernets:
    eth0:
      addresses:
        - 10.10.10.2/24
      gateway4: 10.10.10.1
      nameservers:
          search: [mydomain, otherdomain]
          addresses: [10.10.10.1, 1.1.1.1]
The configuration can then be applied using the netplan command.
sudo netplan apply
Loopback Interface
The loopback interface is identified by the system as lo and has a default IP address of 127.0.0.1. It can be viewed using the ip command.
ip address show lo
1: lo: <LOOPBACK,UP,LOWER_UP> mtu 65536 qdisc noqueue state UNKNOWN group default qlen 1000
    link/loopback 00:00:00:00:00:00 brd 00:00:00:00:00:00
    inet 127.0.0.1/8 scope host lo
       valid_lft forever preferred_lft forever
    inet6 ::1/128 scope host
       valid_lft forever preferred_lft forever
https://help.ubuntu.com/lts/serverguide/network-configuration.html
4.更新主機套件
apt-get update
apt-get upgrade
4-1安裝中文字型
查詢主機目前使用文字
localctl
locale -a
支援清單
localectl list-locales
安裝中文
sudo apt-get -y install language-pack-zh-hant-base language-pack-zh-hant
修改成中文語系
sudo localectl set-locale LANG=zh_TW.UTF-8 LANGUAGE=”zh_TW”
設定檔:sudo nano /etc/default/locale
參考:https://www.server-world.info/en/note?os=Ubuntu_19.04&p=locale
參考:https://samwhelp.github.io/note-ubuntu-18.04/read/howto/install/locale/
4.2 安裝open-vm-tools
sudo apt install open-vm-tools
開啟host os 和 guest os 的共用資料夾功能
若要在開機啟動時,自動掛載共用資料夾的話。
需要在 /etc/fstab 新增一行。
即可完成自動掛載功能
Shared Folders mount is unavailable on Linux VM.
If the Shared Folders feature is enabled on a Linux VM while it is powered off, shared folders mount is not available on restart.
Workaround:
If the VM is powered on, disable and enable the Shared Folders feature from the interface.
For resolving the issue permanently, edit /etc/fstab and add an entry to mount the Shared Folders automatically on boot.
For example, add the line:
vmhgfs-fuse /mnt/hgfs fuse defaults,allow_other 0 0
參考:https://linuxconfig.org/install-vmware-tools-on-ubuntu-18-04-bionic-beaver-linux
5.安裝 openssh 並重新設定ssh-key
Ubuntu Linux install OpenSSH server
To install openssh-server package, run:
$ sudo apt install openssh-server
Verify that ssh service running
Type the following systemctl command:
$ sudo systemctl status ssh
If not running enable the ssh server and start it as follows:
$ sudo systemctl enable ssh

$ sudo systemctl start ssh
剛安裝好的時候,一直都無法登入,會出現被拒絕的訊息。看了log檔出現下面的訊息
Sep 6 01:52:32 osboxes sshd[4744]: error: Error loading host key "/etc/ssh/ssh_host_rsa_key": invalid format

Sep 6 01:52:32 osboxes sshd[4744]: error: Error loading host key "/etc/ssh/ssh_host_rsa_key": invalid format

Sep 6 01:52:32 osboxes sshd[4744]: error: Could not load host key: /etc/ssh/ssh_host_rsa_key

Sep 6 01:52:32 osboxes sshd[4744]: error: Error loading host key "/etc/ssh/ssh_host_ecdsa_key": invalid format

Sep 6 01:52:32 osboxes sshd[4744]: error: Error loading host key "/etc/ssh/ssh_host_ecdsa_key": invalid format

Sep 6 01:52:32 osboxes sshd[4744]: error: Could not load host key: /etc/ssh/ssh_host_ecdsa_key

Sep 6 01:52:32 osboxes sshd[4744]: error: Error loading host key "/etc/ssh/ssh_host_ed25519_key": invalid format

Sep 6 01:52:32 osboxes sshd[4744]: error: Error loading host key "/etc/ssh/ssh_host_ed25519_key": invalid format

Sep 6 01:52:32 osboxes sshd[4744]: error: Could not load host key: /etc/ssh/ssh_host_ed25519_key
備註:sshd error: could not load host key.
處理方式
原來是因為下面的幾個檔案,初始的情況都是空檔案。
rstudio@osboxes:~$ sudo ls -al /etc/ssh/ssh_host_*_key
-rw——- 1 root root 1381 Sep 6 01:59 /etc/ssh/ssh_host_dsa_key
-rw——- 1 root root 505 Sep 6 02:00 /etc/ssh/ssh_host_ecdsa_key
-rw——- 1 root root 1823 Sep 6 01:59 /etc/ssh/ssh_host_rsa_key
所以導致無法登入。
操作方式如下。用 ssh-keygen指令產生檔案即可
$ sudo ssh-keygen -t rsa -f /etc/ssh/ssh_host_rsa_key
$ sudo ssh-keygen -t dsa -f /etc/ssh/ssh_host_dsa_key
$ sudo ssh-keygen -t ecdsa -f /etc/ssh/ssh_host_ecdsa_key
http://ask.xmodulo.com/sshd-error-could-not-load-host-key.html
6.安裝webmin
依照下方指令處理
7.安裝rstudio
依照下方流程處理
先安裝 r-base
apt-get install r-base r-base-dev
其他可能會需要用到的的套件
apt-get install libssl-dev libxml2-dev libcurl4-openssl-dev
apt-get install default-jdk
依原本19.04版本的 安裝完成是 R 3.5.2
R version 3.5.2 (2018-12-20) -- "Eggshell Igloo"
Copyright (C) 2018 The R Foundation for Statistical Computing
Platform: x86_64-pc-linux-gnu (64-bit)
Ubuntu 18+
To download and install RStudio Server open a terminal window and execute the following commands.
64bit
Size: 36.8 MB MD5: 7e84f384a87e219d20c00d8a6bccf532 Version: 1.2.1335 Released: 2019-04-08
$ sudo apt-get install gdebi-core
$ wget https://download2.rstudio.org/server/bionic/amd64/rstudio-server-1.2.1335-amd64.deb
$ sudo gdebi rstudio-server-1.2.1335-amd64.deb
You may choose to verify the build’s GPG signature prior to installing it.
https://www.rstudio.com/products/rstudio/download-server/
安裝完成後,即可使用 http://ip:8787/ 方式登入
安裝 curl package失敗。因為需要先安裝 libcurl4-openssl-dev
sudo apt-get install libcurl4-openssl-dev
* installing *source* package ‘curl’ ...
** package ‘curl’ successfully unpacked and MD5 sums checked
Package libcurl was not found in the pkg-config search path.
Perhaps you should add the directory containing `libcurl.pc'
to the PKG_CONFIG_PATH environment variable
No package 'libcurl' found
Package libcurl was not found in the pkg-config search path.
Perhaps you should add the directory containing `libcurl.pc'
to the PKG_CONFIG_PATH environment variable
No package 'libcurl' found
Using PKG_CFLAGS=
Using PKG_LIBS=-lcurl
------------------------- ANTICONF ERROR ---------------------------
Configuration failed because libcurl was not found. Try installing:
 * deb: libcurl4-openssl-dev (Debian, Ubuntu, etc)
 * rpm: libcurl-devel (Fedora, CentOS, RHEL)
 * csw: libcurl_dev (Solaris)
If libcurl is already installed, check that 'pkg-config' is in your
PATH and PKG_CONFIG_PATH contains a libcurl.pc file. If pkg-config
is unavailable you can set INCLUDE_DIR and LIB_DIR manually via:
R CMD INSTALL --configure-vars='INCLUDE_DIR=... LIB_DIR=...'
--------------------------------------------------------------------
ERROR: configuration failed for package ‘curl’
* removing ‘/home/rstudio/R/x86_64-pc-linux-gnu-library/3.5/curl’
Error: Failed to install 'pttR' from GitHub:
  (converted from warning) installation of package ‘curl’ had non-zero exit status
額外需要套件 安裝 java
【R】安裝rJava 無法正常安裝的錯誤 ubuntu 18.04
> sessionInfo()
R version 3.5.2 (2018-12-20)
Platform: x86_64-pc-linux-gnu (64-bit)
Running under: Ubuntu 19.04

Matrix products: default
BLAS: /usr/lib/x86_64-linux-gnu/blas/libblas.so.3.8.0
LAPACK: /usr/lib/x86_64-linux-gnu/lapack/liblapack.so.3.8.0

locale:
 [1] LC_CTYPE=en_US.UTF-8       LC_NUMERIC=C               LC_TIME=en_US.UTF-8        LC_COLLATE=en_US.UTF-8
 [5] LC_MONETARY=en_US.UTF-8    LC_MESSAGES=en_US.UTF-8    LC_PAPER=en_US.UTF-8       LC_NAME=C
 [9] LC_ADDRESS=C               LC_TELEPHONE=C             LC_MEASUREMENT=en_US.UTF-8 LC_IDENTIFICATION=C

attached base packages:
[1] stats     graphics  grDevices utils     datasets  methods   base

loaded via a namespace (and not attached):
[1] compiler_3.5.2 tools_3.5.2    curl_4.0       remotes_2.1.0

增加swap file
因為虛擬機裡只有 1G的 RAM的話,實在是太小了。
參考文件:https://www.linuxbabe.com/linux-server/create-swap-file-linux-cloud-server
To check your Linux system’s swap space, use the swapon --show command. You may need to use sudo.
swapon --show
Create a Swap File
On a cloud Linux server, you may have only one partition for the root file system. In this case, you have no way of creating another partition and format it as swap partition. In stead we can create a swap file in the root file system.
First we use fallocate command to create a file. For example, create a file named swapfile with 512M capacity in root file system:
sudo fallocate -l 512M /swapfile
To create a 1G file:
sudo fallocate -l 1G /swapfile
Then make sure only root can read and write to it.
sudo chmod 600 /swapfile
Format it to swap:
sudo mkswap /swapfile
Output:
Setting up swapspace version 1, size = 524284 KiB
no label, UUID=h32b3e10-0779-4865-9ea0-6e2af8f3kea9
Enable the swap file
sudo swapon /swapfile
Now you can see that it’s enabled with swapon --show command.
admin@server:~$ sudo swapon --show
NAME      TYPE  SIZE  USED  PRIO
/swapfile file  512M  132K  -1
To let Linux automatically mount this swap file when booting up, add this line to /etc/fstab file.
/swapfile none swap defaults 0 0
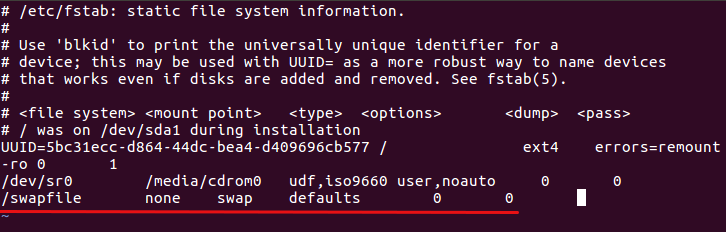
Please note that you need to delimit each column with Tab key.
並且測試自動掛載是否成功?
How do you validate fstab without rebooting?
you can simple run: mount -a
-a Mount all filesystems (of the given types) mentioned in fstab.
This command will mount all (not-yet-mounted) filesystems mentioned in fstab and is used in system script startup during booting.
Hits: 66
